
Product Features:
The enamel is coated inside the water tank which is of high corrosion resistance and of great pressure bearing. Our porcelain enamel tanks approved by CE, WATER MARK, ETL, WRAS, EN12977-3
 The whole system approved by SOLAR KEYMARK (EN 12976 Standard)
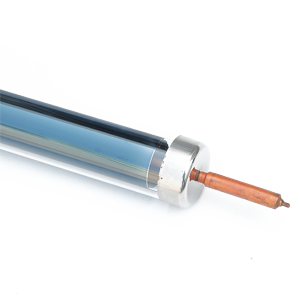
High efficiency due to the best conduction performance. Heat pipe invacuum tube can transfer hot energy to cold water in pressurized water tank rapidly. No water in the glass vacuum tubes, one tube broken don’t influence the whole system working.
High Quality Parts:
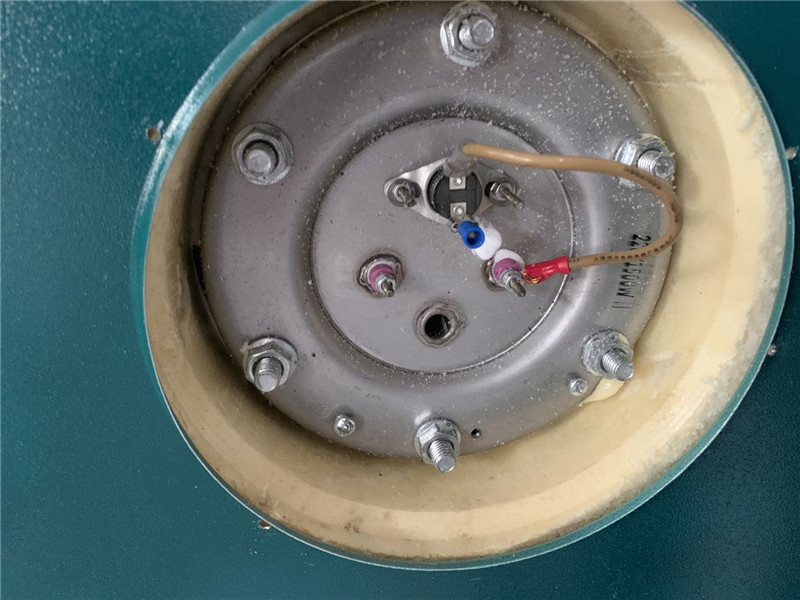
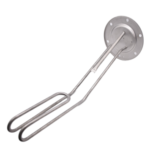 Incoloy 800 Electric Element
CE Approved
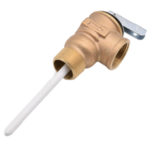 P/T Safety Valve
Water Mark Approved
 Intelligent Controller
CE Approved
 Magnesium Anode
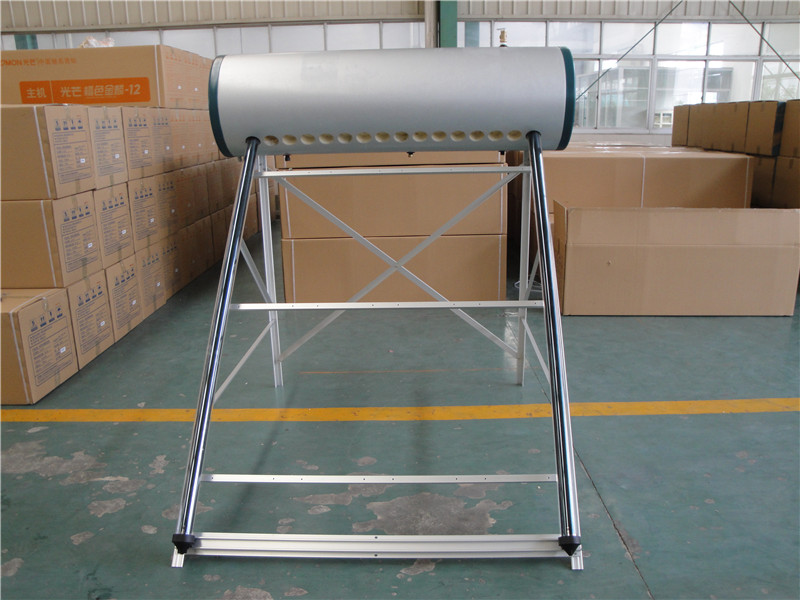

Installation and Operation Manual:
1. Advanced technology:
The core parts of the solar water heater --- Heat pipe vacuum tube and Enamel coated inner tank involve numerous national patented technology. The heat pipe vacuum tube with advanced technology in gathering solar energy features water-tightness, high heat absorption, independent heat supply, fast energy output, wide scope of application and long working life.
2. Low heat loss:
With imported polyurethane foam en-bloc high pressurized, which is of high density and strength, the solar heater has excellent heat insulation.
3. Superb process technology:
The Enamel coated inner tank is made of special metal, formed up with advanced punching technology and auto non-electrode replacing welding technology. A special silicate is sintered by high temperature to the inner tank’s walls, forming a special protection layer featuring freedom of leakage, rust/erosion and scaling, thereby effectively preventing leakage between the water tank and the heat-gathering tubing and ensuring the cleanness of water.
4. Low heat diffusion
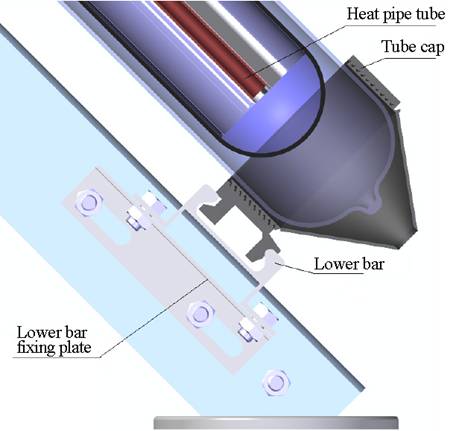
● Connections to water outlet, sensor and electrical auxiliary element are all underneath the water tank.
● Heat diffusion at all connections is greatly reduced, virtually eliminating heat diffusion by convection, resulting in high heating efficacy.
● Thorough draining of hot water in the tank, effectively enhancing the volume utilization rate
● Air deletion/overflow outlet is led indoor through pipeline, easy to monitor and reducing waste of water
● Water inlet can be fitted with built-in high-level single-line valve to realize automatic water feeding, stopping water feed when full.
5. Easy for functional extension:
This solar water heater is fitted with water feed-in connection; overflow connection, and connections to computerized controller and electrical element. The user can have a number of options depending on his actual needs.
● Connections to sensor and electrical element are plugged
● Sensor is an accessory to the computerized controller and is sold together with computerized controller, electrical element and water feed-in valve as accessories.
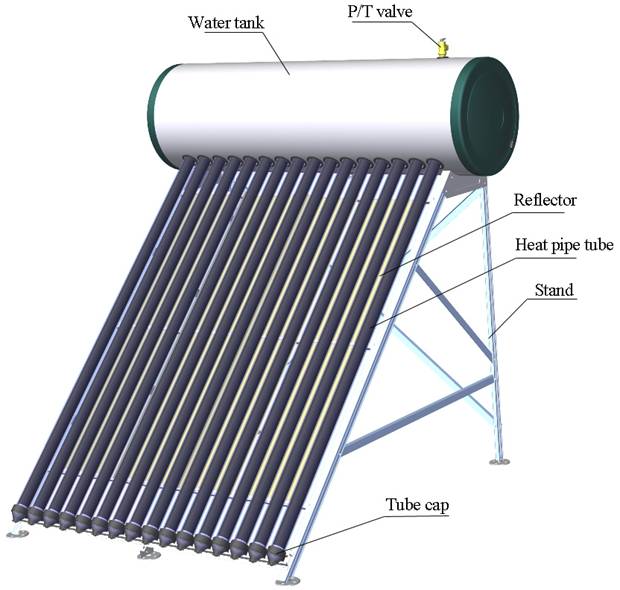
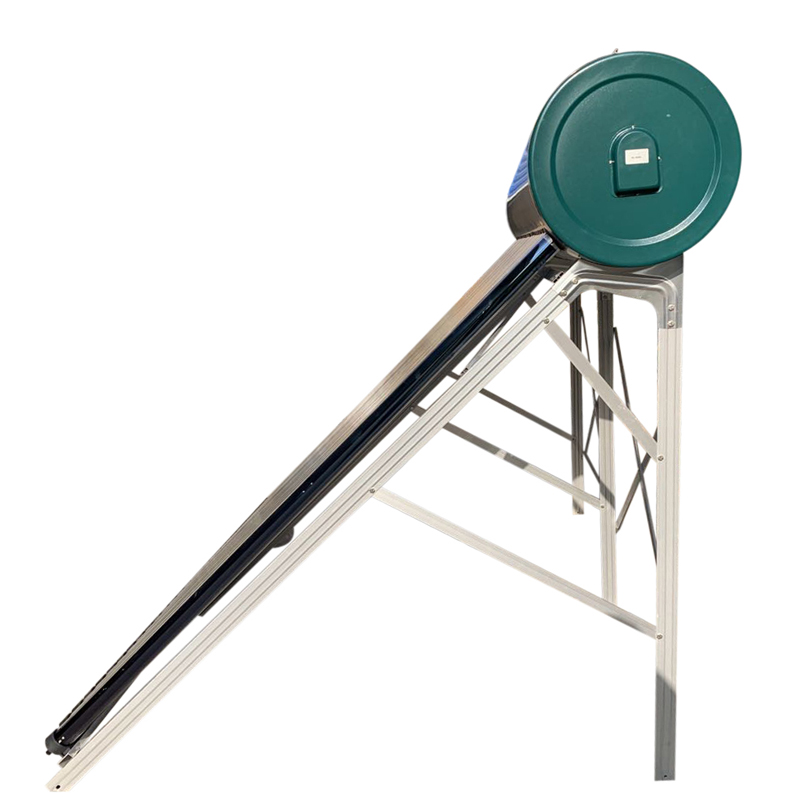
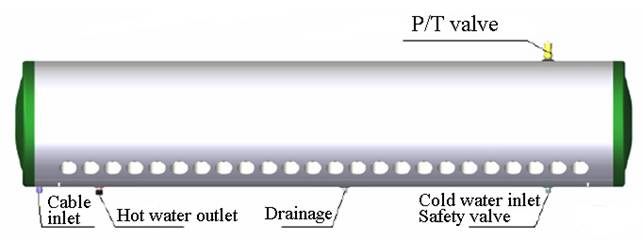
2. Water tank (see Fig 2)
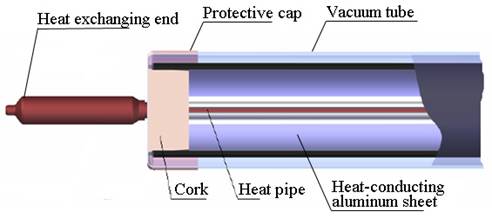
3. Heat pipe vacuum tube (see Fig. 3)
| Item Model | Capacity of water tank (L) | Number of heat pipe vacuum tube | Specification of heat pipe vacuum tube | Aperture area (m2) | Working pressure (MPa) | Rated voltage (V~) | Rated power (kw) | Dimensions (mm) |
| BRJ2-108-1.98-0.6-C | 108 | 12 | Φ58×1500 | 1.98 | 0.6 | 220 | 1.5 | 1338*1677*1863 |
| BRJ2-136-2.65-0.6-C | 136 | 16 | Φ58×1500 | 2.65 | 1678*1677*1863 | |||
| BRJ2-153-2.97-0.6-C | 153 | 18 | Φ58×1500 | 2.97 | 1848*1677*1863 | |||
| BRJ2-172-3.30-0.6-C | 172 | 20 | Φ58×1500 | 3.30 | 2018*1677*1863 | |||
| BRJ2-201-3.96-0.6-C | 201 | 24 | Φ58×1500 | 3.96 | 2358*1677*1863 | |||
| BRJ2-250-4.96-0.6-C | 250 | 30 | Φ58×1500 | 4.96 | 2868*1677*1863 |
Attention!
● Qualified professionals must do installation of the solar heater
● Location of installation must be flat, with no object blocking in the front to reduce heat gathering efficiency
● Installation foundation of the solar heater shall bear twice the weight of water container holding capacity
● Installation must be secure and stable to prevent damage and accident
● It is recommended to provide the hot/cold water pipelines with adequate insulation in order to prevent freezing in winter times, which will affect the normal use of the heater
● Before installation be sure to check the water tank of the heater for alien matter and flush it clean with water
1. Supporting stand assembly (see Fig 4):
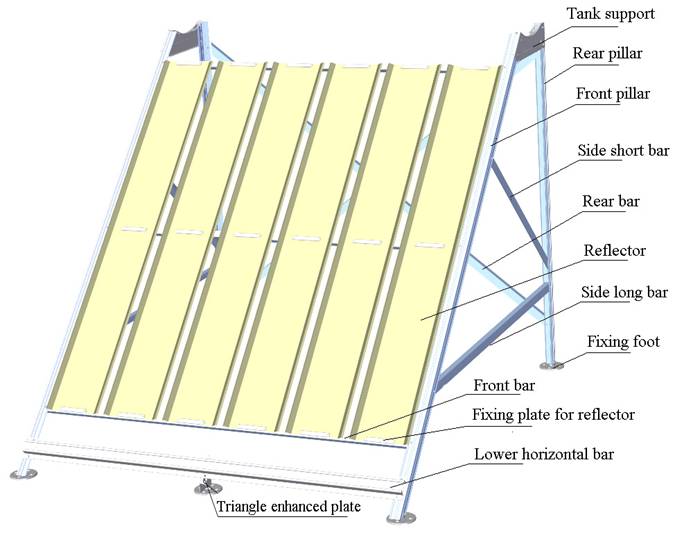
● Assemble Right and Left tank supports, Right and Left front pillars, and fixing feet by M6*12 and M6 screws.
● Assembly rear bars, rear pillars, side short bars, side long bars, etc by M6*12 and M6 screws.
● Assembly reflecting plates and their fixing plate, middle horizontal bar and front bar by M6*10 screws.
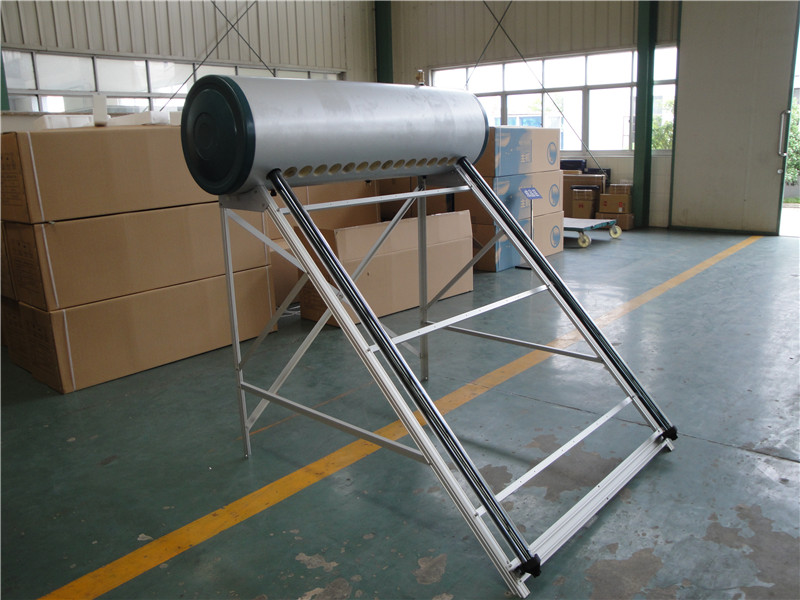
2. Installation of water tank and heat pipe vacuum tube
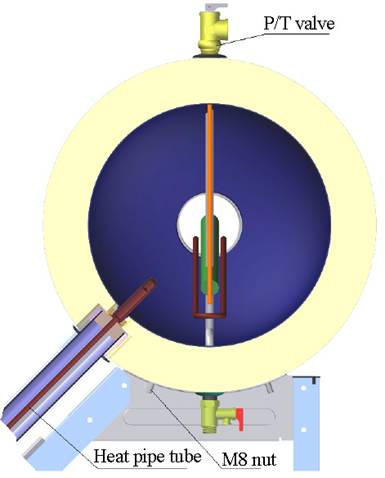
A. Set the water tank symmetrically on the supporting frame and secure with 4 sets of M8 nuts, please see Fig 5
B. Installation of heat pipe vacuum tube to the water tank:
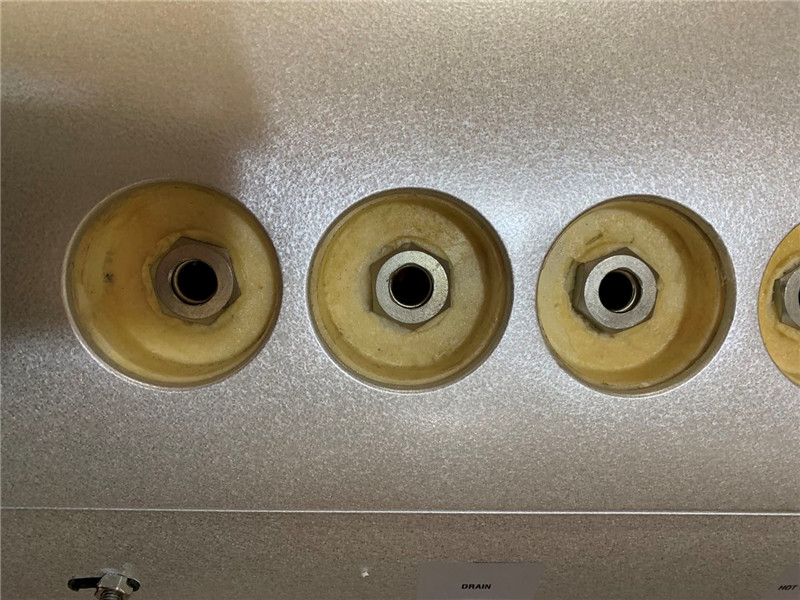
Run in the upper protection ring at the condensing end of the heat pipe vacuum tube, apply heat conducting silicon grease to the condensing end of the tube and then insert the condensing end of the inner tube into the water tank’s heat conducting sleeves, see Fig 6.
C. Installation of the adjustable tail seat:
Run in the tail seat retention ring at the tail end of the heat pipe vacuum tube and fit the tail seat retention ring to the lower horizontal linkage rod as shown in Fig.6. Then fit the tail seat adjusting ring to the retention ring by turning the former; while turning, apply appropriate force to lift the heat pipe vacuum tube upward so that there is no room for it to move up/down.
3. Installation of the reflector
Set the reflector and the reflector fastening between the two pairs of heat pipe vacuum tube, fastening them with M4x55 bolts and M4 nuts respectively.
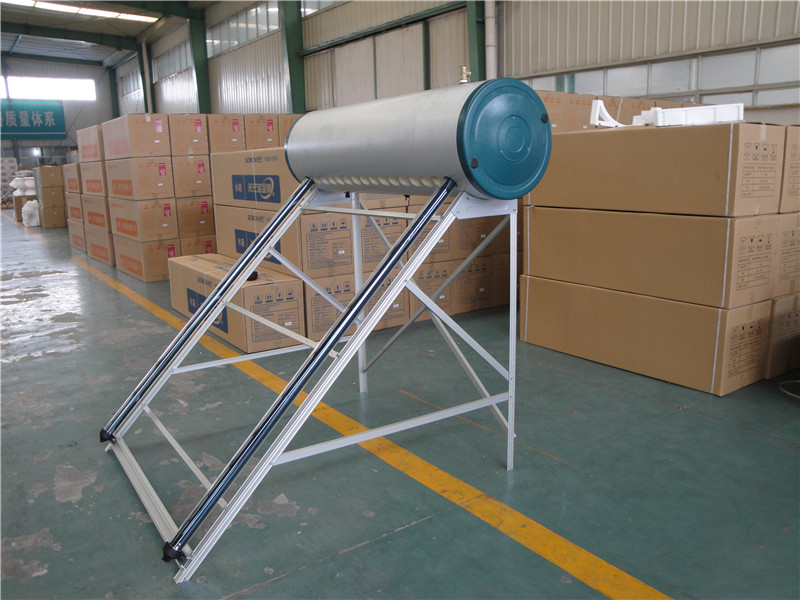
4. Installation of pipeline
please pay attention to the following when doing the installation: see Fig 7

① There are G1/2〞 screw thread for all the joints of tank’s cold and hot water, and the joint of P/T valve is G3/4〞
② Layout should be according to the pipe installing regulation.
③ One- way safe draining valve should be installed at cool water inlet joint, which should be connected with air and towards downside, the position cannot be too deep, normally 10mm.
④ The outside pipes need over 50mm warm-keeping to avoid being frozen in winter.
⑤ While connecting pipes, do not use too big force.
⑥ If solar water heater is higher than the around buildings, lightening rod is needed. The lightening rod of building should be 50cm higher than the water tank and the interval space not less than 30mm.
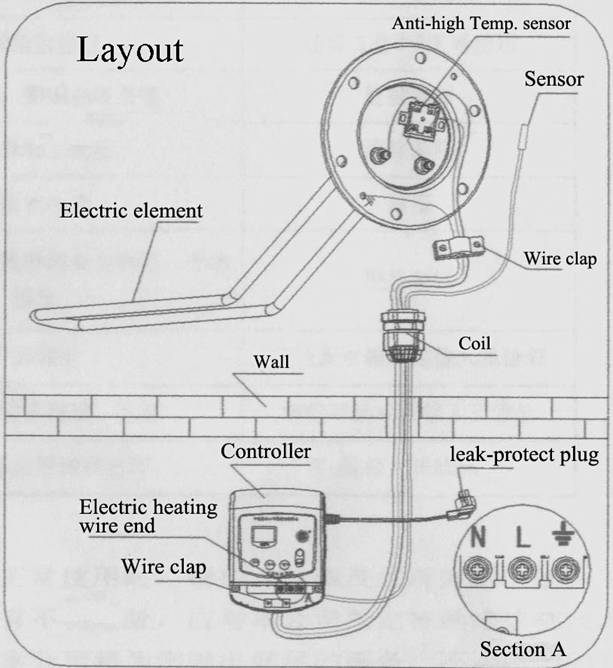
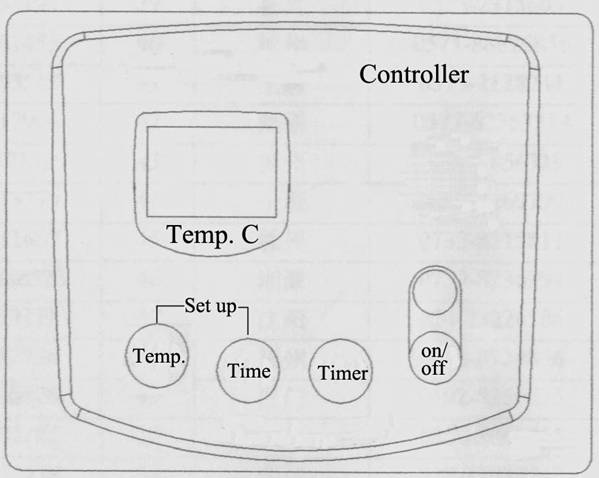
5. Installing micro controller:
Caution
① The socket and plug should be connected well.
② If auxiliary electric heating system installed, do connect the live wire, null wire and ground wire correctly with power-leakage protection plug. The socket should be connected to ground reliably.
③ Use tri-wire plug of safe protection, and the rated current value of socket ≥10A
④ Safe measures should be taken and layout to specification.
⑤ Installing micro controller Details see the manual of Micro Controller.
| Symptoms of trouble | Causes | Way of removing |
| No self check at switch on, no display or confused display | Poor contact at power input plug | Unplug power, and check the plug and plug in again |
| Display is “_______” | Poor contact of sensor plug in or wire broken | Plug in again or replace |
| Leakage protection’s power indicator not lit up | Leakage protection is activated | Check the cables and electrical heating tubing for power leakage |
| No heating and no temperature-rise, heating indicator is constantly on | Electrical heating tube is damaged Temperature reaches the set value | Replace the heating tube Set water temperature at a higher value |
| Water in the tank not hot | Heat gathering tubing covered up by dust etc | De-dusting, remove covering |
| Low solar radiation | Let the heater work 2—3 days before using | |
| Heat gathering tubing damaged, low absorption | Replace heat gathering tubing | |
| Scaling on the heat conducting sleeve | Remove the scaling | |
| No hot water or no water comes out | Low tap water pressure | Boosting the pressure |
| Feed in valve not shut properly or damaged one way safety valve, resulting in hot water returning | Replace the valve | |
| Leakage in water tank | Replace tank or send for repairs | |
| Freezing of outdoor plumbing | De-freezing or send for repair crew | |
| Pipeline fallen off or valve failure | Send for repairs |